OEM 13c – Summer 2019 Announcements. You can manage ATP and more!!

Here are some exciting announcements for OEM 13c.

First, keep in mind that you should upgrade your OEM 13c to the latest version (13.3PG). I discussed some new features of this version in a previous post.

Now to the good news.  

1. Oracle Database 19c has been certified as a OEM Repository Database (OMR). This means that is time to upgrade your repository to a long term support release.

  More info : EM 13.3C: Certification of 19c Database as an EM Repository Database and as a Managed Target (Doc ID 2541711.1)    

2. Oracle EM 13.3.2 Bundle Patch (BP) is available. You must keep up with patching if you don’t want to encounter issues down the road.  

More info: Enterprise Manager Cloud Control Database Plugin 13.3.2.0 Bundle Patch Bug List (Doc ID 2554474.1)    

3. The latest EM 13.3.2 BP 3 has support for Oracle Autonomous Database (ATP-D). So, if you are running ATP in dedicated mode and you want to use OEM to manage your DB, is time to patch!!

More info: https://blogs.oracle.com/oem/oracle-enterprise-manager-cloud-control-13c-release-3-db-plugin-133200-with-bundle-patch-3-is-now-available-in-self-update    

Thanks,
Alfredo

Oracle Autonomous Data Warehouse – What is it?

Oracle Autonomous Data Warehouse (ADW) is one of the so-called DB as a Service (DBaaS) or probably we should call it Data Warehouse as a Service (DWaaS) with the difference that this service is completely automatic and autonomous.  

This service is comprised by an Oracle Database (of course) already pre-configured for analytics, data lakes and data warehouse workloads. This Oracle Database (PDB) has 18c features running on Exadata hardware. Oracle Exadata software is 18c with features like In-Memory delivered from the cell server.  

There’s a service console that helps to manage the ADW services.

On top of this, Machine Learning (ML) tools help with data analysis and data models.   Development tools like SQL Developer are useful to create objects, load data and more.  

Let’s now talk about tasks that happen automatically:  

Automatic statistics gathering during direct-path load operations

Automatic tuning

Automatic Partitioning

Automatic In-Memory

Automatic Indexing (soon)

Automatic Compression

Automatic Tablespace Management

Automated backups and patching  

ADW is also capable of repair itself. Machine Learning is used to detect anomalies and uses pattern recognition to determine if this problem is already in the problem knowledge-base. If is a known problem, it will apply the fix automatically.  

On the security side all the information is encrypted at rest. This means that backups and all data in the tablespaces is encrypted using TDE.

The connectivity between ADW and the rest of the world is secured be default. Oracle provides a wallet file that contains all the connectivity information required to login.

If you open this file you’ll notice that all connectivity is being done through SSL.

 (security=(ssl_server_cert_dn=… 

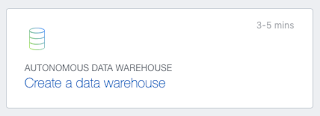
Provisioning is quite easy using the service console.   From the main dashboard you can click on “Create a data warehouse” button.

Select the Workload type between Autonomous Data Warehouse ADW or Autonomous Transaction Processing ATP loads.


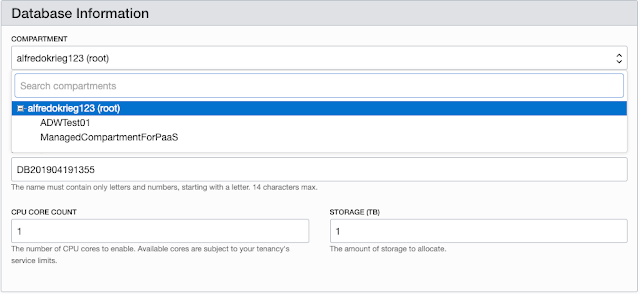
Next you choose a compartment where the ADW database is going to live. For this example I’m going to choose ADWTest01 compartment. It is not recommended to use the root compartment.


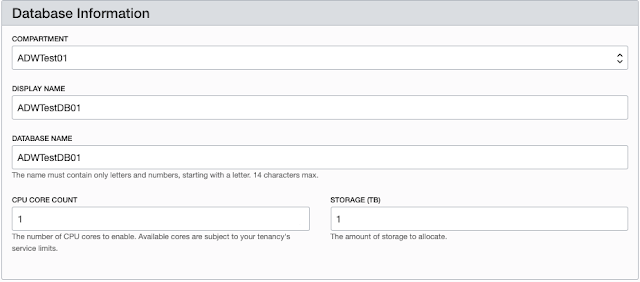
Then we are going to set the Display and Database names. For this example, I’m choosing 1 OCPU and 1 TB of storage. Keep in mind that ADW is elastic, this means we can add more OCPUs and Storage on the fly without the need for downtime.


From the Administrator Credentials section we are going to set the ADMIN account password.


Next is license type. You can choose to use a license that you already own or subscribe to a new one.


Last but not least is the Tags section. You can add a tag to this ADW database to better manage it inside your tenancy.


Let’s now click Create Autonomous Database and wait few minutes for OCI to provision it.


The orange ADW icon will turn green once the ADW database is fully provisioned.


In my next post I’ll cover how to connect o the ADW database and how to load data to it.
 
Thanks,
Alfredo

Create a Linux VM on Azure

In this post I’ll show you how easy is to create a Linux VM in Microsoft’s Azure cloud.
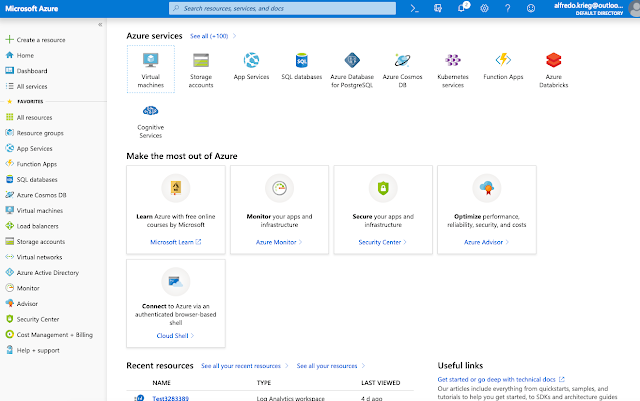
Once you login to Azure using your account you will be presented with the main dashboard.
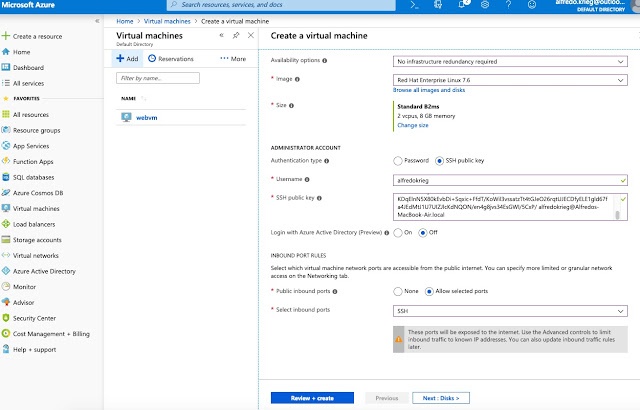
Click on Virtual Machines and then click Add.
The first section contains the basic information of your VM.
Select a subscription. In my case is the Free Trial subscription.
For Resource group we are going to click Create new. A resource group is a logical way to organize your resources.
I just created an oracle-vm-resource-group.


Type a VM name and select the desired Region for your VM. The region is where the datacenter is located. You may want to choose the closest one to you. For availability I’m going to choose no infrastructure redundancy required as this is a test VM. There are different availability types for your VM. Below URL links to a document that explains the Azure regions and sets in detail.
The size of the VM will have a direct impact on your bill. Be careful when you chose the sizing as you don’t want to waste resources and money and on the other side you don’t want to have a system that is underperforming. Click on Change size and below table will show you all your options.

I selected 2vcpus, 8 GB memory VM.
For the ADMINISTRATOR ACCOUNT I’m going to chose SSH public key to connect to my VM.
In the SSH public key, I’m going to provide the public key of my local computer so I can gain access to the VM.
I don’t have a corporate Active Directory in my lab, so Login with Azure Active Directory is turned off.
Public inbound ports will allow SSH to connect.


Nor for Disks. There are 3 options. Premium SSD is the fastest option available and is used for production like workloads. Standard SSD still delivers good performance while the Standard HDD is the cheapest and slowest option.
I’m going to create a 300 GB Standard SSD disk for this VM.


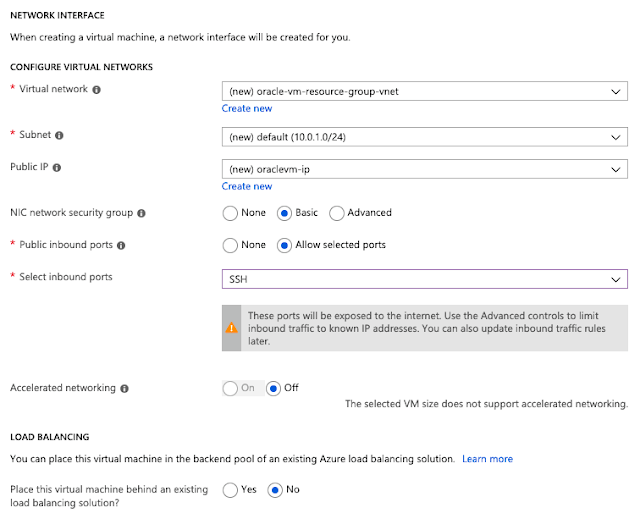
For the NETWORK INTERFACE section my Virtual Network is going to be under my oracle-vm-resource-group. The Subnet and the Public IP will be created (new) and as previously selected the SSH inbound port is going to be open. 


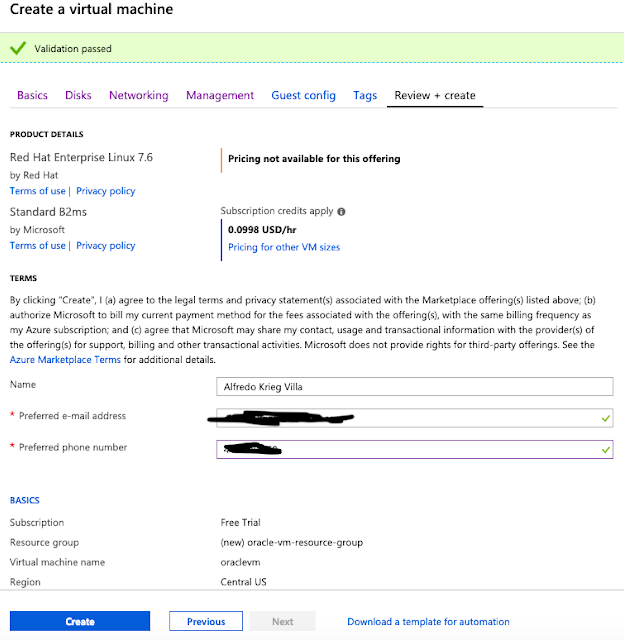
For Management and Guest config I’ll leave the defaults and I’m going to jump to the Review + Create section. In this Review + create section you can see an estimate of your VM pricing.


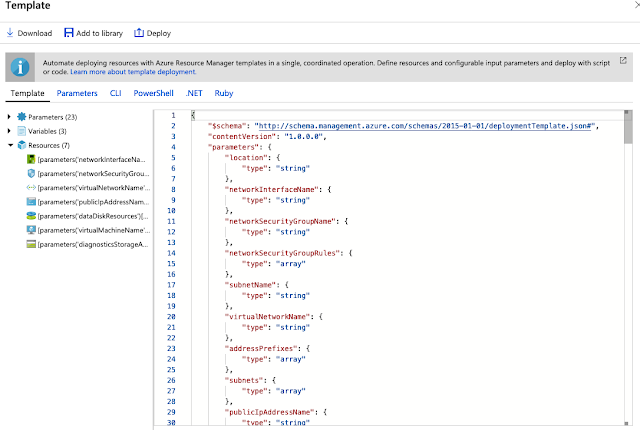
Now, if you need to create multiple VMs like this, you may want to automate the process using the Azure CLI. Click on the Download a template for automation link located in the bottom right part of the page. I’ll cover Azure CLI in a later post.


Now click on Create and wait for your VM to be provisioned. You’ll receive a notification once the VM is created. 


Now is time to connect to it. From the VM dashboard find the Public IP address. Or you can click on connect button for more details.


Now connect to it using SSH. As we already shared our public key this should work without using a password.
$ ssh alfredokrieg@23.99.209.18
The authenticity of host ‘23.99.209.18 (23.99.209.18)’ can’t be established.
ECDSA key fingerprint is SHA256:yfdef8ToOBoI5a/FCogDbVMGCsdsZXmSylnH4yZ4sZs.
Are you sure you want to continue connecting (yes/no)? yes
Warning: Permanently added ‘23.99.209.18’ (ECDSA) to the list of known hosts.
$ hostname
oraclevm
Thanks,
Alfredo